Home |

Introduction
Call Center Announcements represent the greetings and announcements that callers hear when they reach the call center. From the dropdown, ther are five announcement types that can be configured for your Call Center -- Entrance, Estimated Wait, Comfort, Music on Hold and Call Whisper. To access your Call Center Announcement settings, go to Settings and then Detailed Settings.
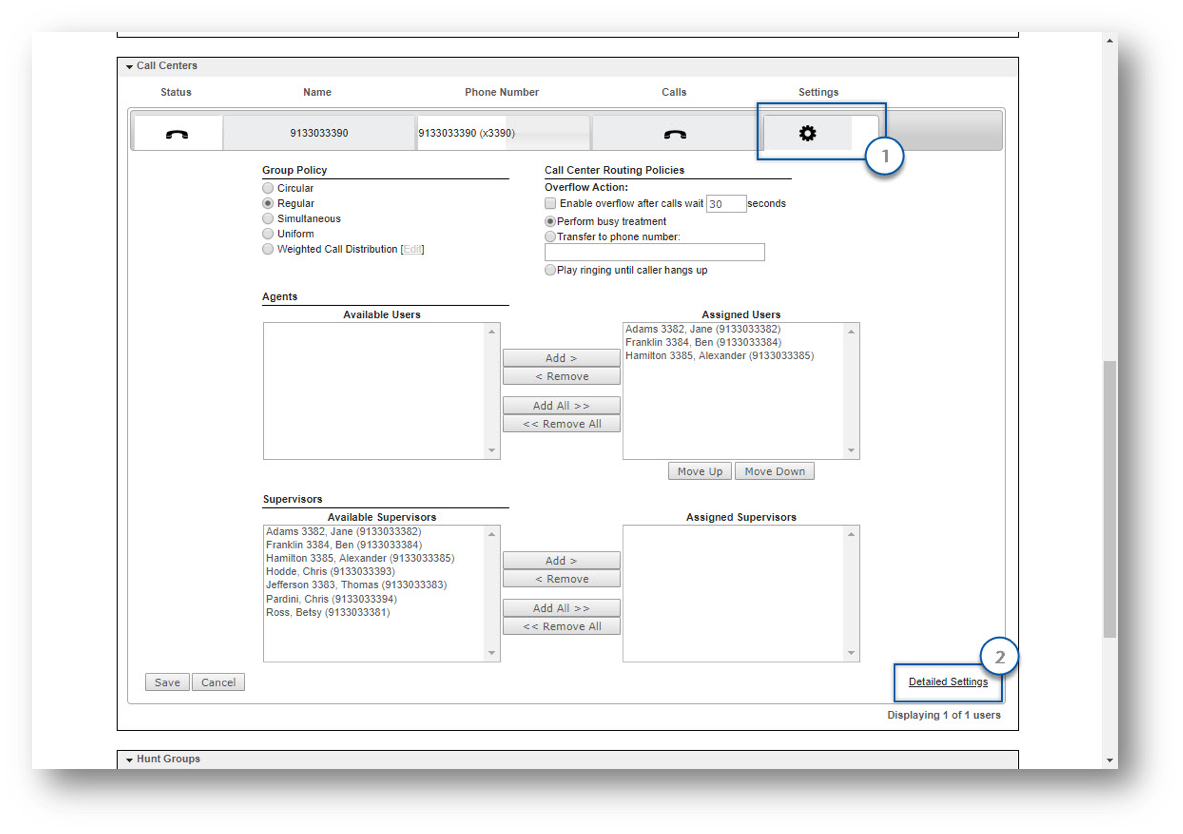
This guide will go through the steps for configuring these options
1.
Entrance
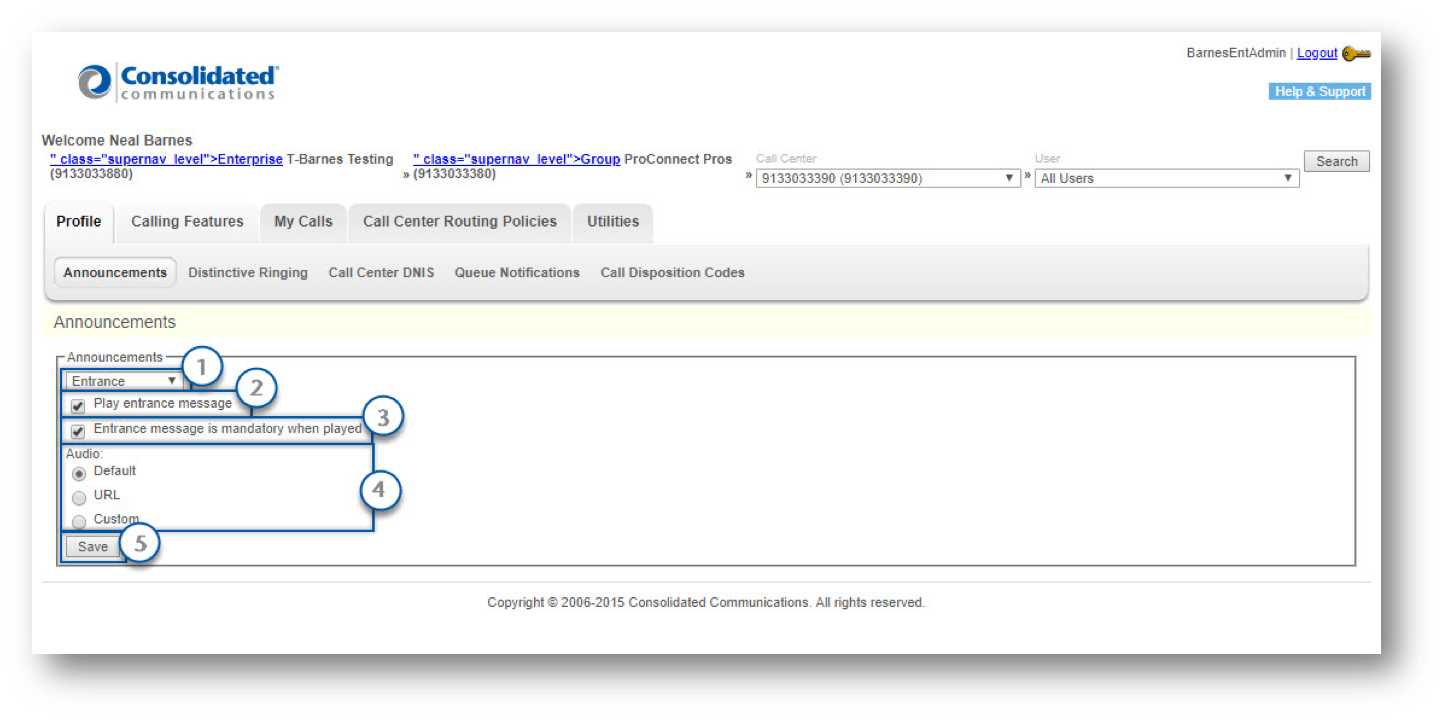
The Entrance message is the first message played to callers when they reach the call center. This is an optional message. To enable and modify the Entrance message settings, follow these steps.
-
- Select Entrance from the drop-down menu.
- Then, check Play entrance message.
- Once enabled, you can set this to be mandatory by selecting Entrance message is mandatory when played. This will require callers to hear a message before they speak to an agent.
- Next, assign the entrance announcement under the Audio section.
-
-
- Default – This option will play the system default announcement.
- Custom – Add a custom announcement by selecting this option and uploading your recording.
-
Note: Custom pre-recorded greeting files must be saved in C.C.I.T.T u-law settings with 8 kilohertz, 8bit-mono attributes as a .wav file. To save a recording in this format, you may need to use a basic sound recorder.
-
-
-
- Once you have saved your file in the proper format to a folder on your computer, select the Choose File button and select the file from your computer and select “Open”.
- Next, select Upload to upload the file.
-
-
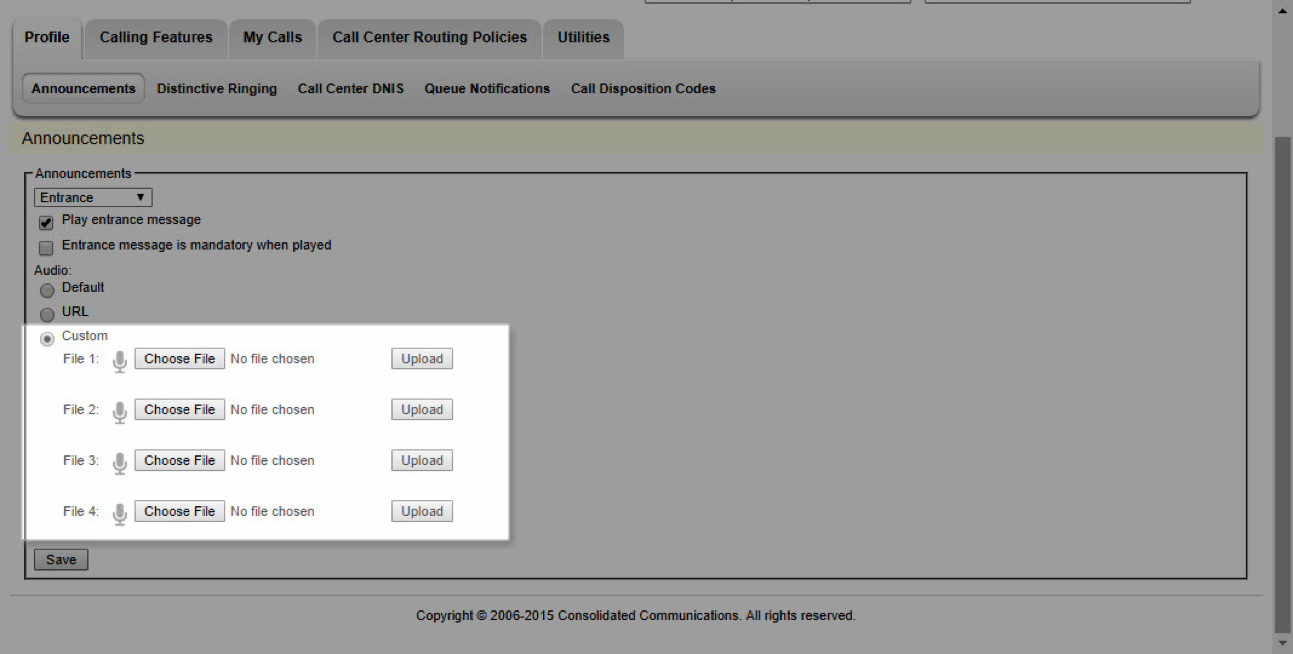
Note: You can upload up to 4 greetings. These will play in sequence.
-
- Select Save to save your settings.
Once the entrance message, or string of messages has finished playing, Music On Hold and comfort messaging are provided to the caller, if enabled.
2.
Estimated Wait
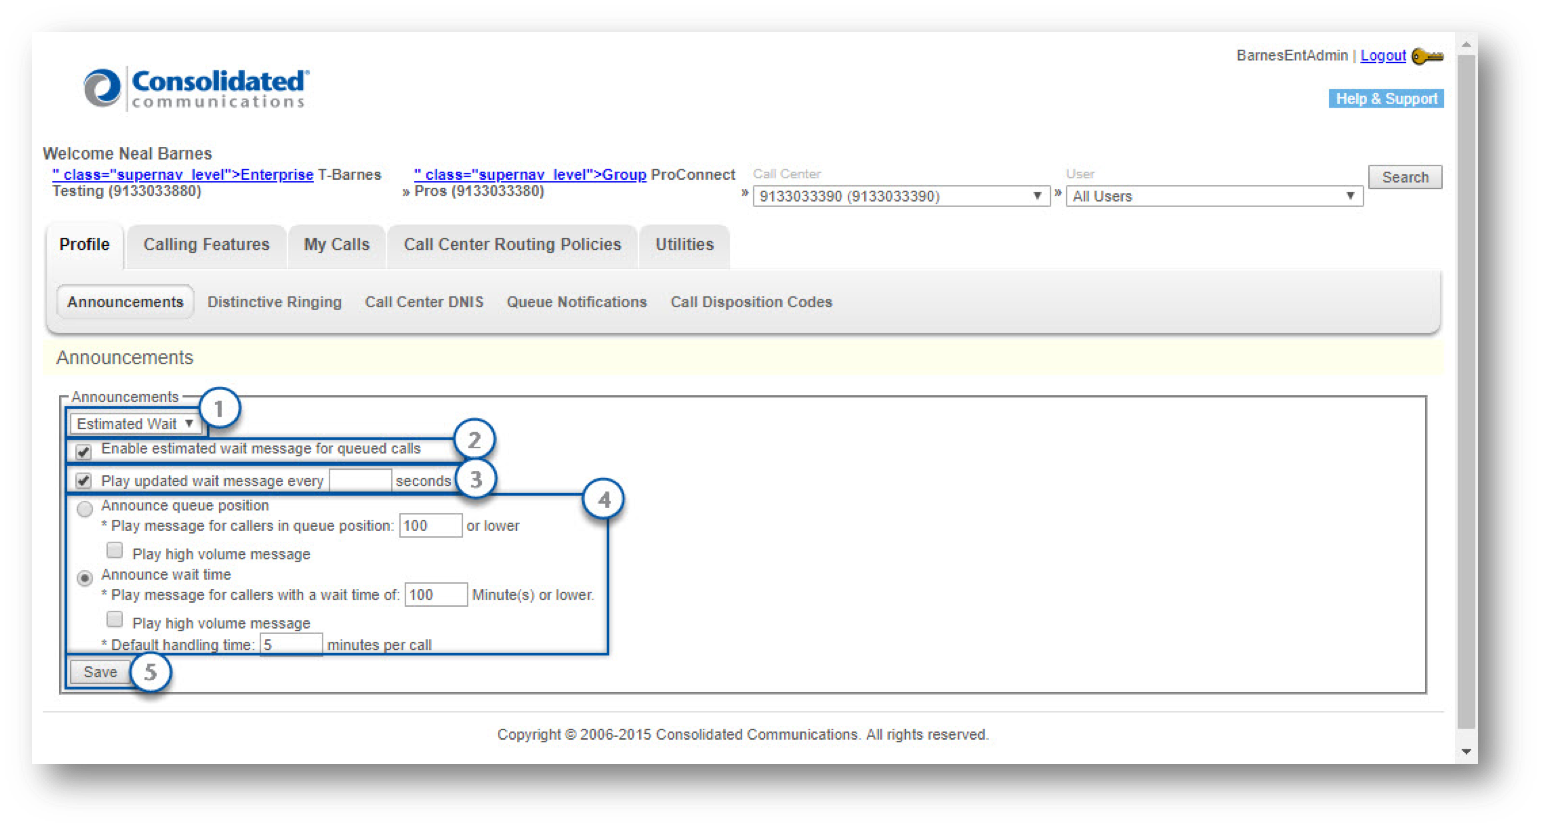
The Estimated Wait settings determine optional announcements based on the caller’s position in queue or estimated wait time. To enable or configure your Estimated Wait settings, follow these steps.
- Select Estimated Wait from the drop-down menu under Announcements.
- To enable either the queue position or the wait time, check Enable estimated wait message for queued calls.
- To have an updated wait message played after a predetermined number of seconds, check Play updated wait message every (enter seconds) seconds and set the number of seconds for the message to play.
- Then, select either Announce queue position or Announce wait time.
- Announce queue position – If selected, determine when the message plays by configuring the number of callers that will hear the announcement. For example, if this is set to 50, the 51st caller will not hear their queue position, but callers 1-50 will. There is an optional system setting, Play high volume message that can be played for callers outside of the threshold. Select the Play high volume message option to enable.
- Announce wait – If selected, determine when the message plays by configuring the number of minutes that callers will hear the announcement. For example, if this is set to 12 minutes, callers that have an estimated wait time of more than 12 minutes will not hear the announcement. There is an optional system setting, Play high volume message that can be played for callers outside of the threshold. Select the Play high volume message option to enable.
- Default handling time – This setting is used to calculate the estimated wait time if the system is unable to generate the default handling time. Enter the handling time in minutes here.
- Select Save to save your settings.
3.
Comfort
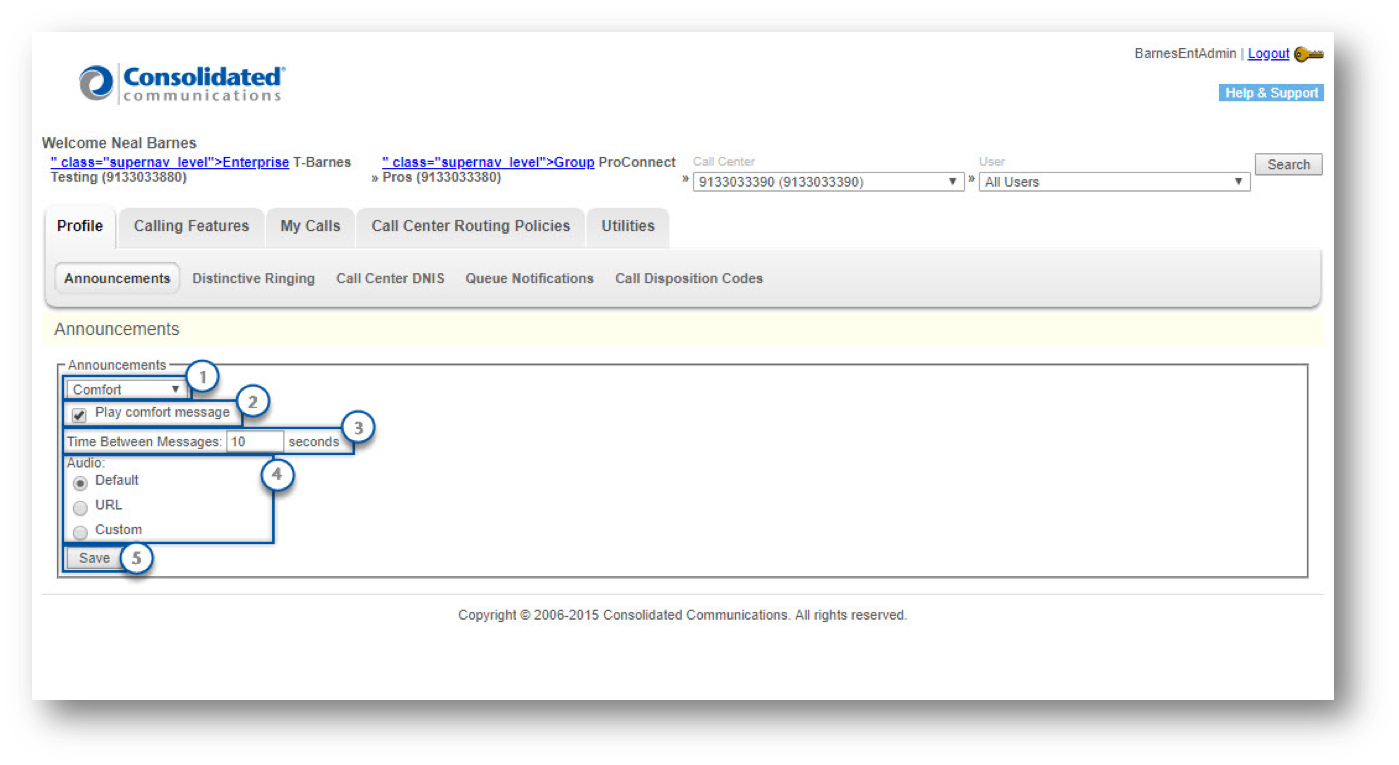
The Comfort message is played after the Music On Hold message. The Comfort message and Music On Hold message will continue to alternate until an agent answers. To enable or configure your Comfort message settings, follow these steps.
-
- Select Comfort from the drop-down menu under Announcements.
- Then, check Play comfort message to enable.
- Enter, in seconds, the time the music on hold should play before the comfort message repeats.
- Next, assign the comfort announcement in the Audio section.
-
-
- Default – This option will play the system default announcement.
- Custom – Add a custom announcement by selecting this option and uploading your recording.
-
Note: Custom pre-recorded greeting files must be saved in C.C.I.T.T u-law settings with 8 kilohertz, 8bit-mono attributes as a .wav file. To save a recording in this format, you may need to use a basic sound recorder.
-
-
-
- Once you have saved your file in the proper format to a folder on your computer, select the Choose File button and select the file from your computer and select “Open”.
- Next, select Upload to upload the file.
-
-
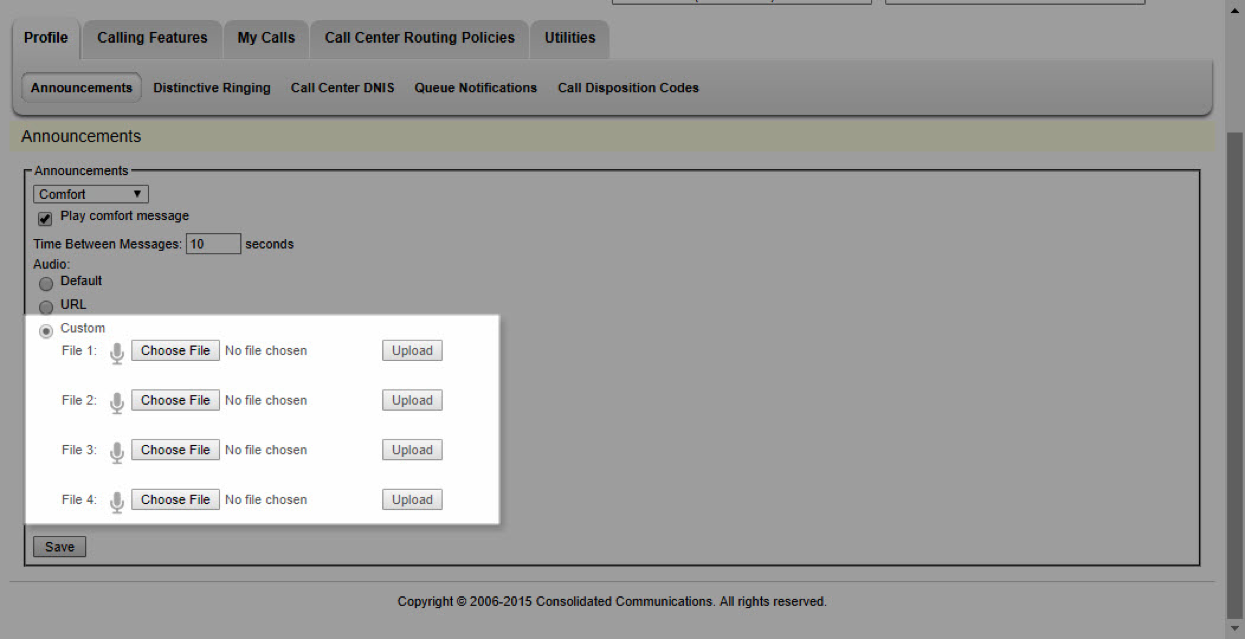
Note: You can upload up to 4 greetings. These will play in sequence.
-
- Select Save to save your settings.
4.
Music On Hold
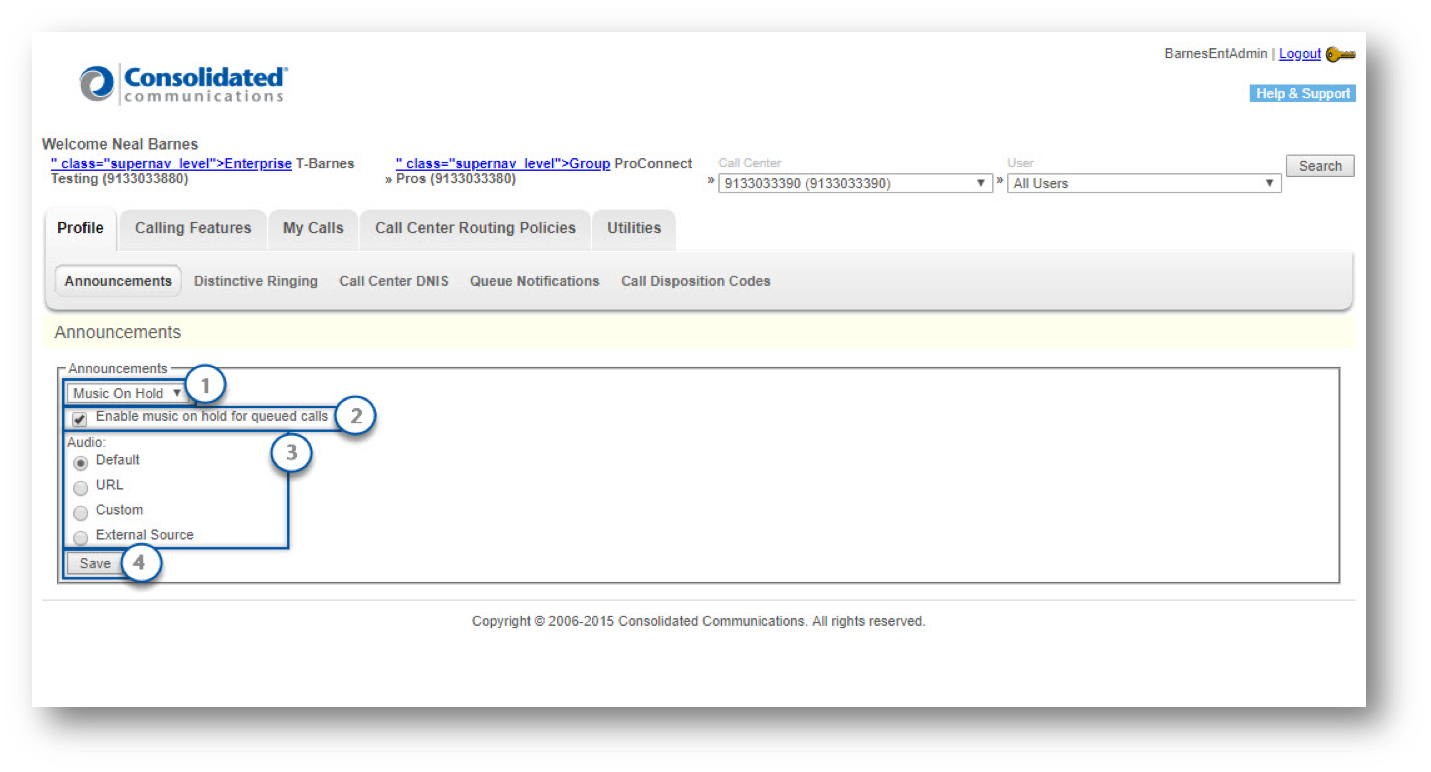
The Music On Hold settings represent the music callers hear after the Entrance message and before the Comfort greeting. To enable and configure hold music, follow these steps.
-
- Select Music On Hold from the drop-down menu under Announcements.
- Then, check Enable music on hold for queued calls.
- Next, select the music on hold announcement found under Audio.
-
-
- Default – This option will play the system default music on hold.
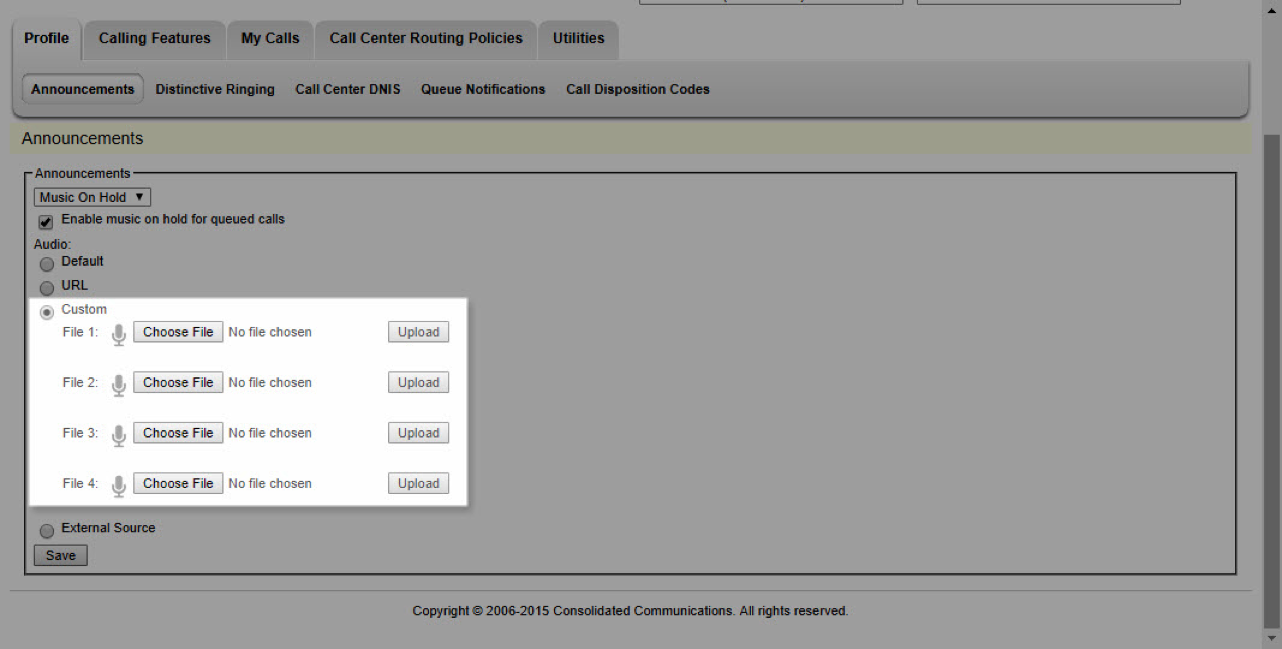
- Custom – Select this option to add a custom Music On Hold file and upload your recording.
-
Note: Custom pre-recorded greeting files must be saved in C.C.I.T.T u-law settings with 8 kilohertz, 8bit-mono attributes as a .wav file. To save a recording in this format, you may need to use a basic sound recorder.
-
-
-
- Once you have saved your file in the proper format to a folder on your computer, select the Choose File button and select the file from your computer and select Open.
- Next, select Upload to upload the file.
-
-
-
-
- Select Save to save your changes.
5.
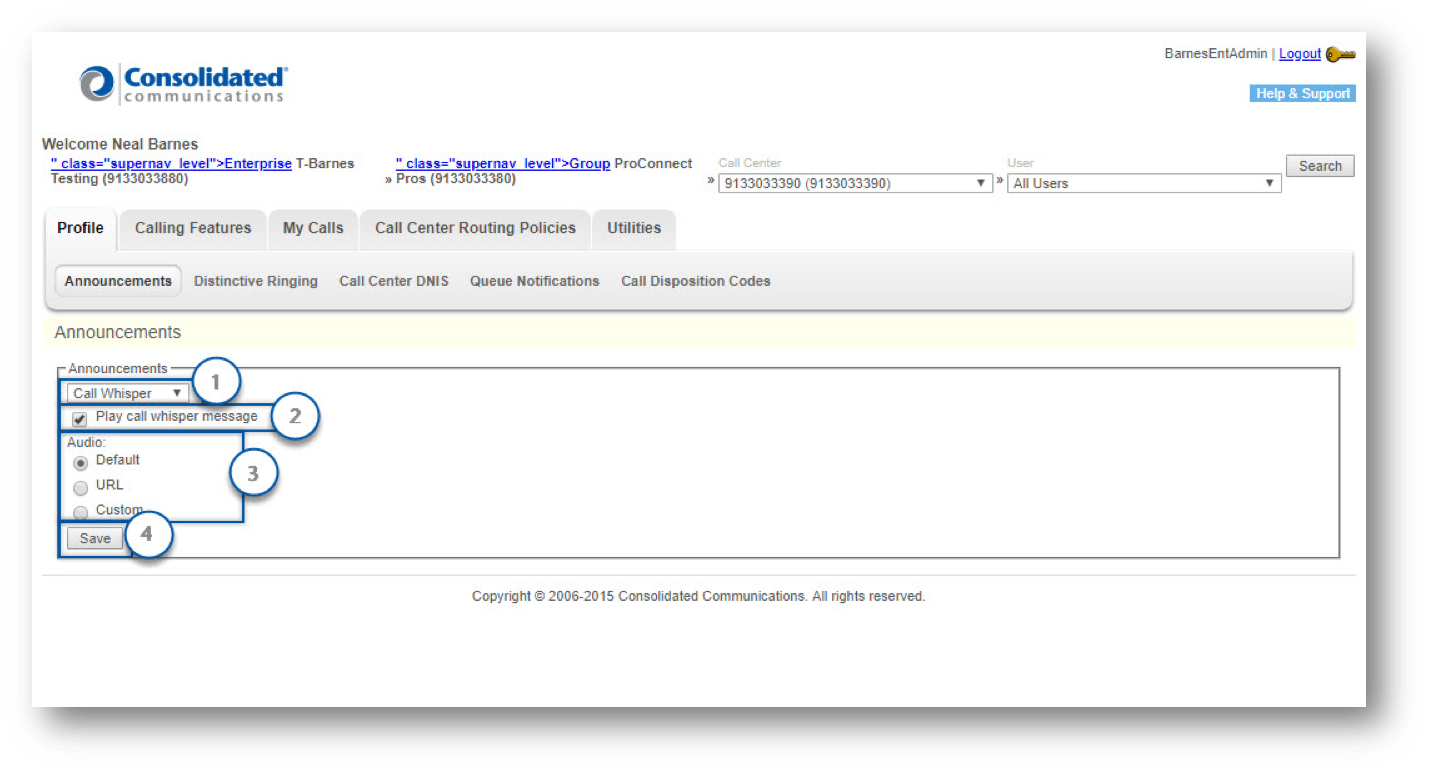
Call Whisper
The Call Whisper message is played to the agent immediately before the inbound call is connected. The calling party hears ring back, announcements, or music on hold during the whisper message. The message typically announces which call center the call is coming from. This announcement can also be used to remind agents of current specials or promotions associated with the call center the caller is calling in on. To enable and configure your Call Whisper settings, follow these steps.
-
- Select Call Whisper from the drop-down menu under Announcements.
- Then, check Play call whisper message to enable the feature.
- Next, assign the Call Whisper announcement under Audio.
-
-
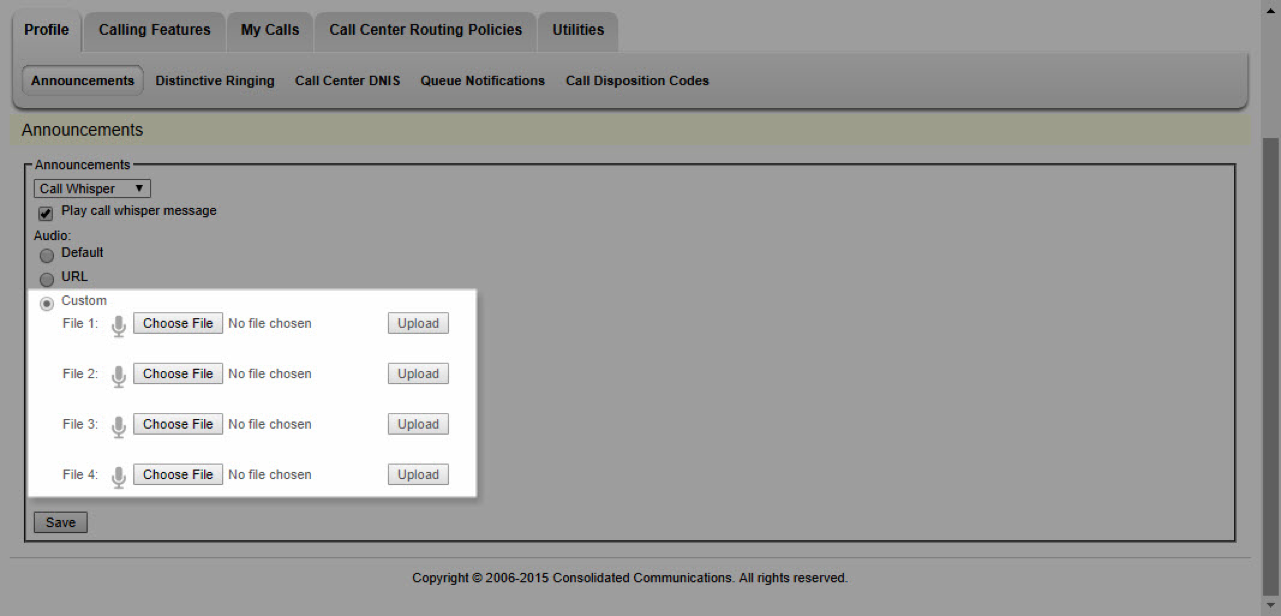
- Default – This option will play the system default announcement.
- Custom – Select this option to customize your announcement, for example you may want to remind agents that a promotion ends in 2 days, and upload your recording.
-
Note: Custom pre-recorded greeting files must be saved in C.C.I.T.T u-law settings with 8 kilohertz, 8bit-mono attributes as a .wav file. To save a recording in this format, you may need to use a basic sound recorder.
-
-
-
- Once you have saved your file in the proper format to a folder on your computer, select the Choose File button and select the file from your computer and select Open.
- Next, select Upload to upload the file.
-
-
-
-
- Select Save to save your settings.