Home |
WHAT YOU NEED TO KNOW:
Within the Call Center section of the Admin Portal, you can enable and modify several call center features.

Introduction
This guide will take you through the steps for configuring the following settings.
1.
Ring Pattern
The Ring Pattern is the pattern incoming calls will ring to agents when an inbound call comes into the call center and/or call queue. To configure the Ring Pattern, follow these steps:
-
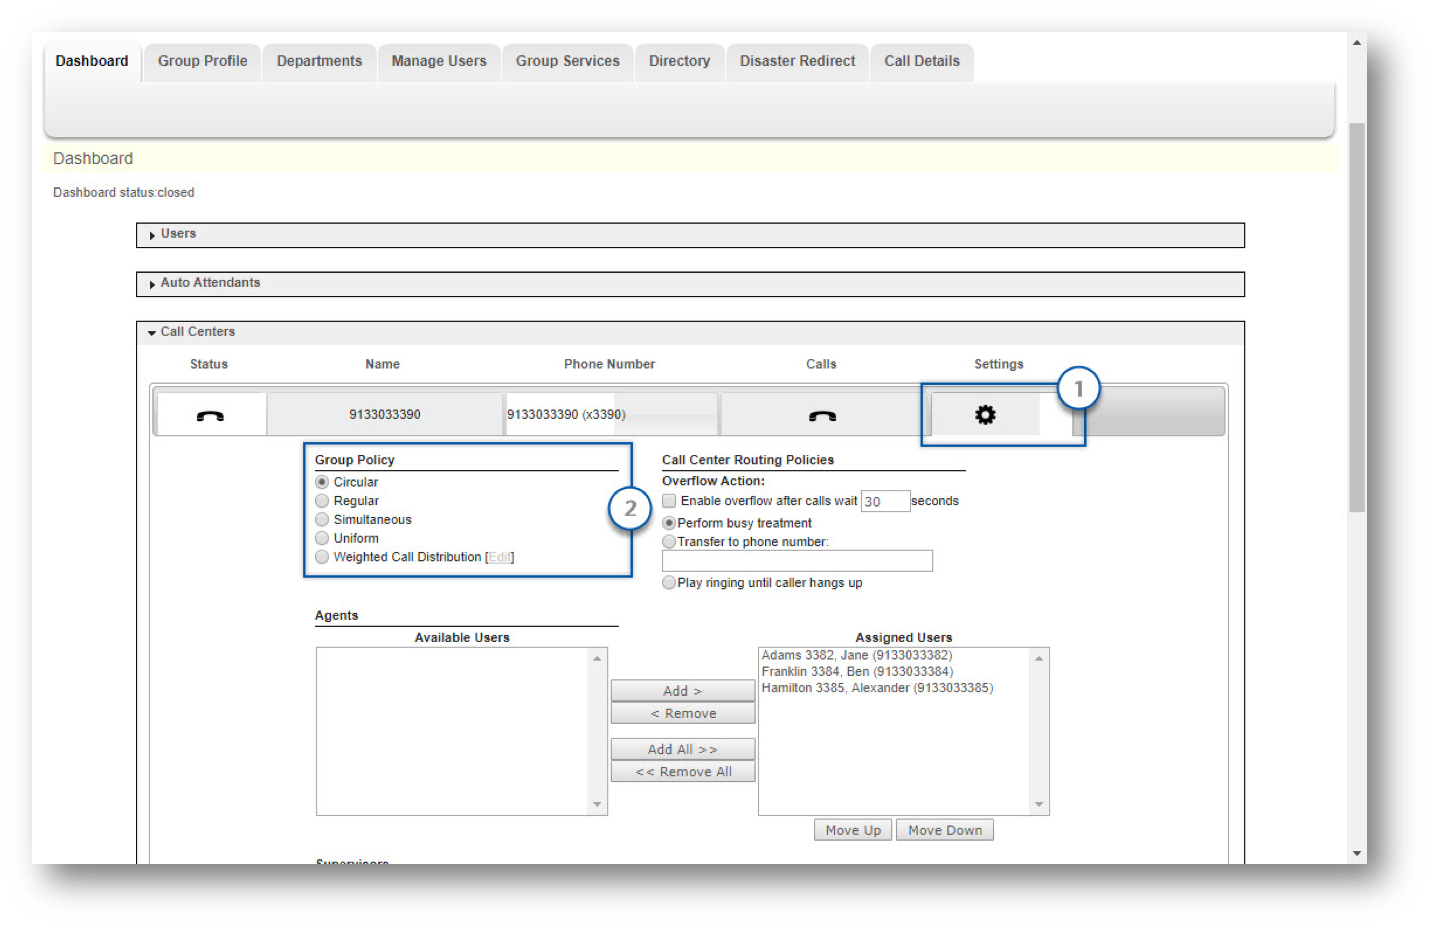
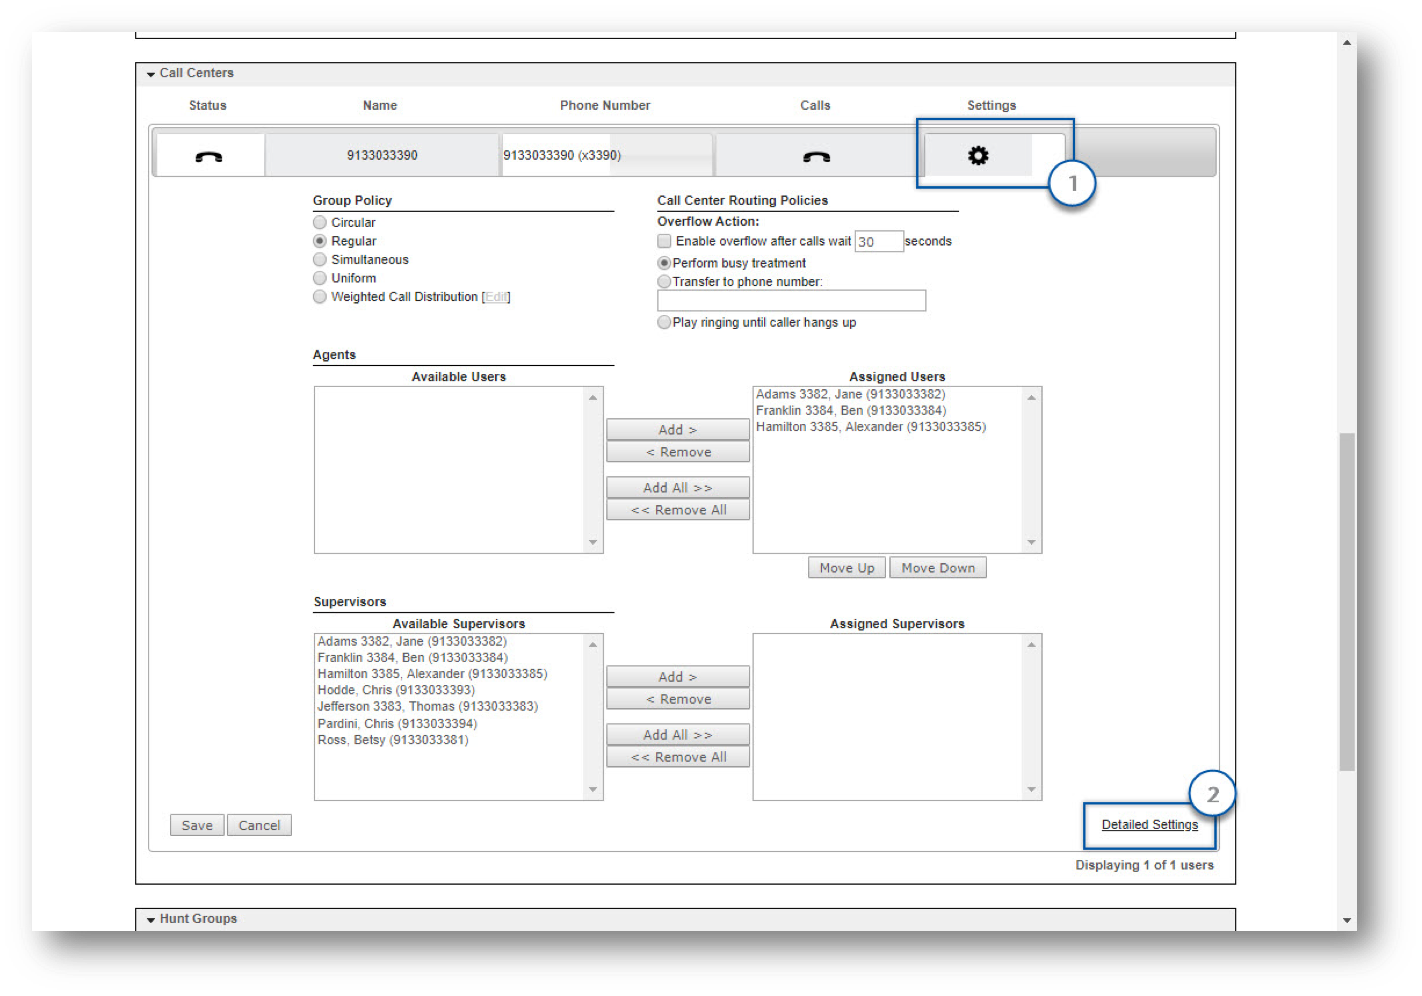
- Select the Settings icon next to the Call Center to modify.
- Under Group Policy, the following options will determine your ring pattern:
- Circular – This option rings agents phones one-at-a-time, always ringing the agents in the same order. The system notes the last agent to answer a call, then rings the next agent on the Assigned Users list.
- Regular – This option rings agent’s phones one-at-a-time, always starting with the agent configured at the top of the Assigned Users list first, followed by the agent listed beneath, in sequential order.
- Simultaneous – Rings all assigned users at once.
- Uniform – Rings the agent in the group who has been idle the longest.
- Weighted Call Distribution – Allows you to direct a certain percentage of calls to individual agents. For example, agent A is designated to receive 20 percent of calls, while agent B receives 80 percent. Select Edit to assign weights (or percentages) to agents. These weight assignments must total 100 percent.
Note: Agents with a zero percent weight assignment will only receive calls when all other agents are on calls delivered to them from the Hunt Group
2.
Overflow Action
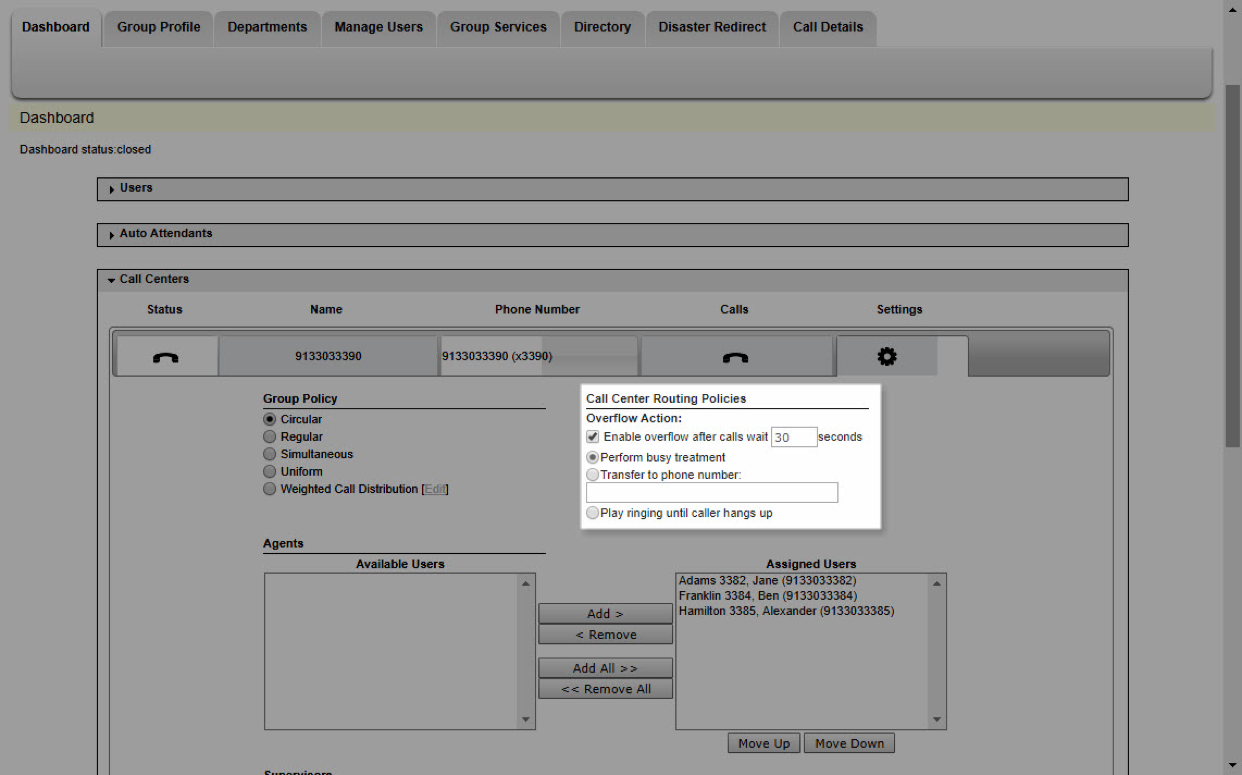
To change the Overflow settings of the Call Center, edit the options under Call Center Routing Policies.
-
- If you would like to edit the Overflow action, check or uncheck the box next to Enable overflow after calls wait (insert seconds) seconds. If the box is checked, Overflow is enabled and the call will be routed with one of the below options after the wait timer expires:
- Perform Busy Treatment – When this option is selected the caller will hear a busy signal when they reach the end of the wait timer.
- Transfer to Phone Number – When this option is selected, the call will be transferred to the destination identified in the phone number field here. This number can be an extension, an external number or a voicemail box.
- Play Ringing Until Caller Hangs Up – When this option is selected, the caller will hearing ringing when they reach the end of the wait timer until either the call is answered or the caller hangs up.
- If the box is unchecked, Overflow is disabled and callers will remain in the queue until either the call is answered or the caller hangs up.
- If you would like to edit the Overflow action, check or uncheck the box next to Enable overflow after calls wait (insert seconds) seconds. If the box is checked, Overflow is enabled and the call will be routed with one of the below options after the wait timer expires:
-
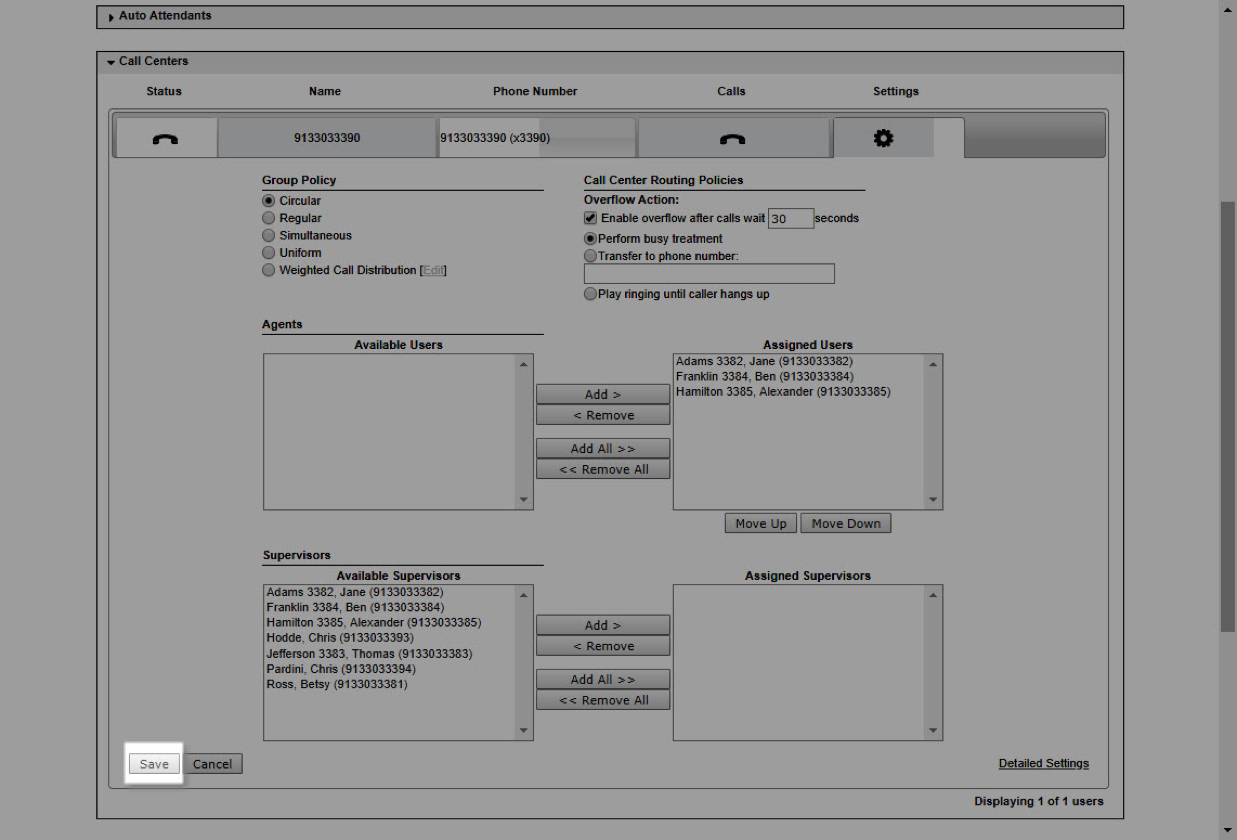
- Once you have made your changes, select Save.
3.
Distinctive Ringing
The Distinctive Ringing feature allows you to assign a particular ring pattern on your phone for call queue calls. This will make it easy to tell if the call is one from the call queue, from another user or from an outside line. To configure the Distinctive Ringing feature, follow these steps:
-
- Select Settings within the Call Center menu.
- Then, select Detailed Settings.
-
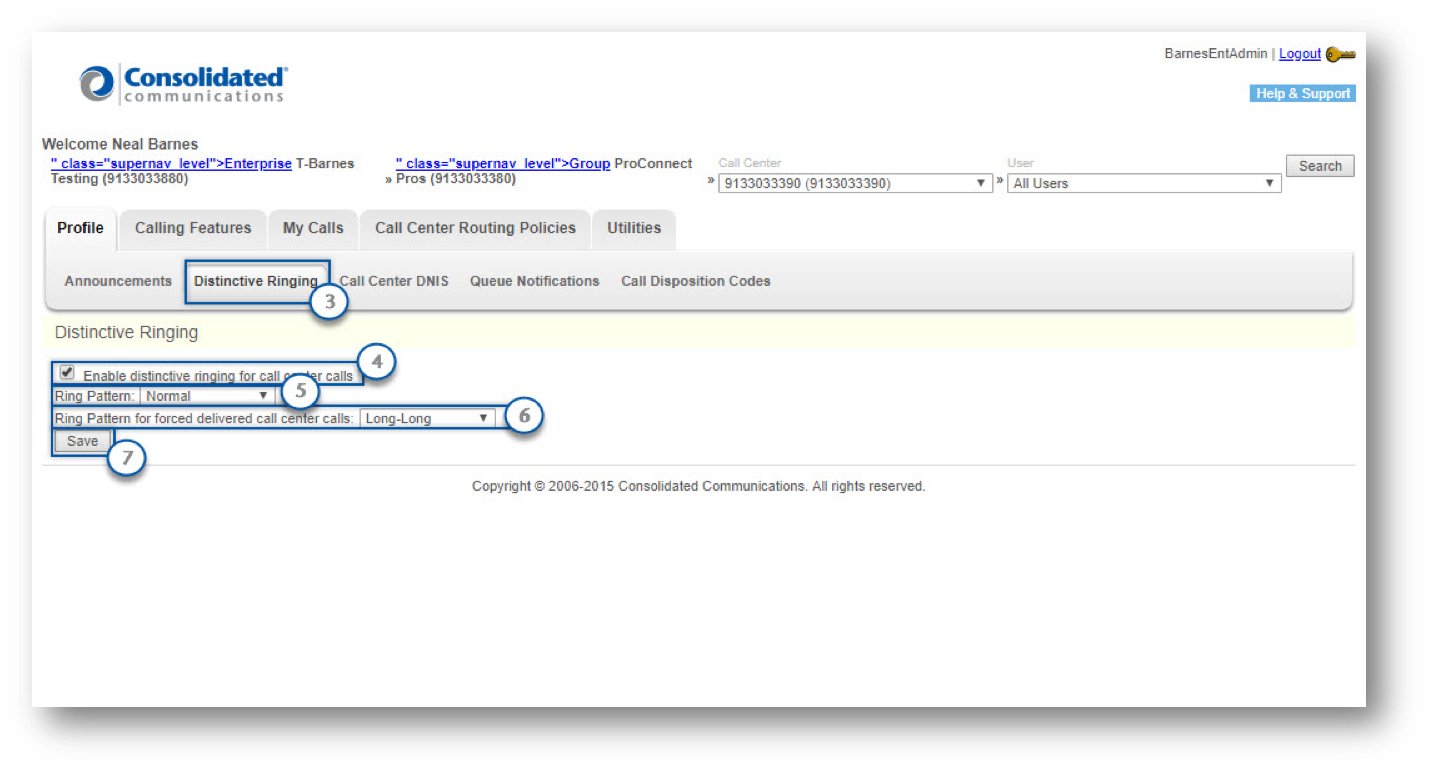
- Select Distinctive Ringing from the top menu.
- Then, check Enable Distinctive ringing for call center calls to enable.
- Next, select the ring pattern from the drop-down list.
- Normal
- Long-Long
- Short-Short-Long
- Short-Long-Short
- Then, select the Ring Pattern for forced delivered call center calls from the drop-down list.
- Normal
- Long-Long
- Short-Short-Long
- Short-Long-Short
Note: This only applies when Forced Forwarding is enabled.
-
- Select Save to save your changes.
4.
Call Center DNIS
The Call Center DNIS, or Dialed Number Inbound Service, is a telephony term that refers to the called or dialed number. This setting configures the caller ID that is shown to agents on incoming calls. The default display shows the caller ID name configured for the call center and the calling party’s calling phone number. To configure these settings, follow these steps.
-
- Select Settings within the Call Center menu.
- Then, select Detailed Settings.

-
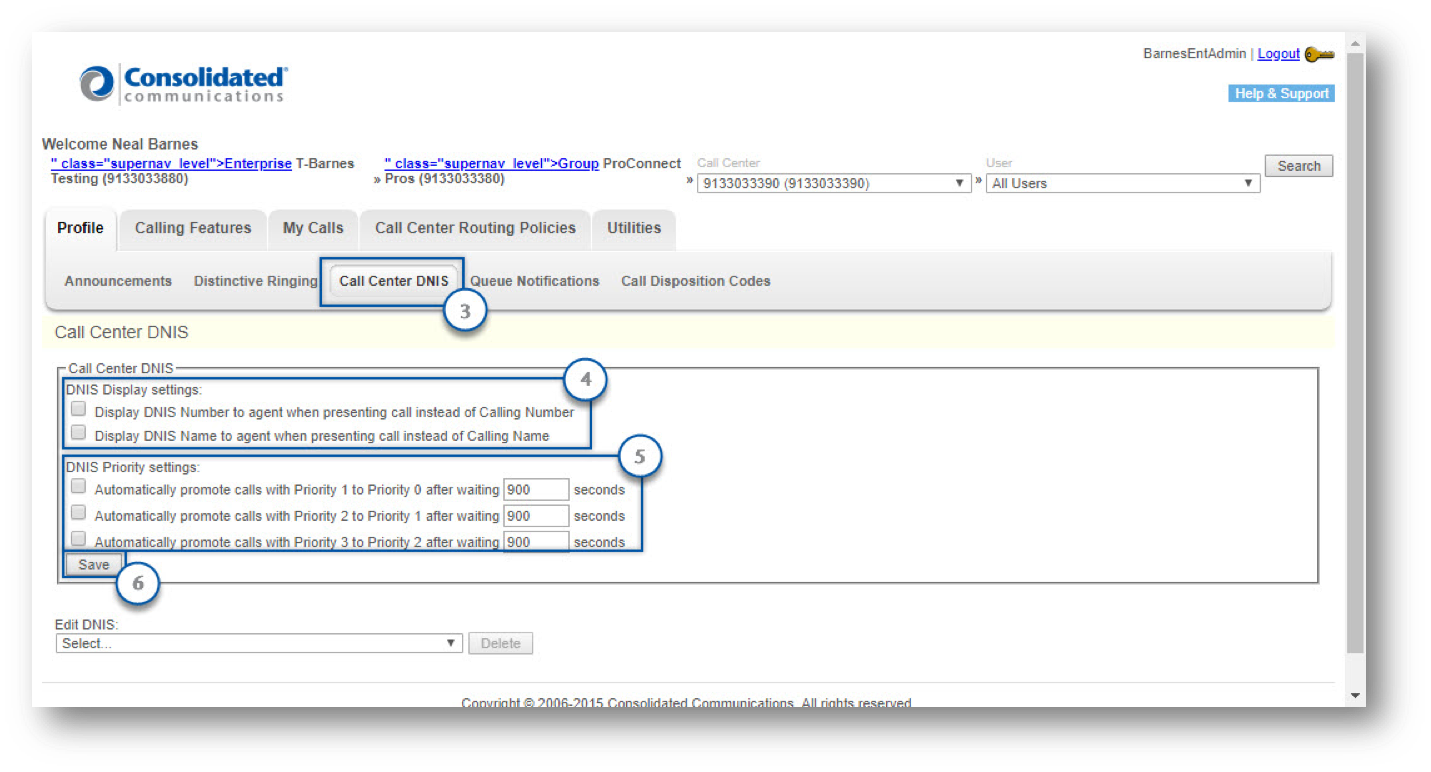
- Select Call Center DNIS from the top menu.
- Then, select your DNIS Display settings.
- Display DNIS number to agent instead of Calling Number – When this feature is enabled, the caller ID will display the Call Center DNIS phone number that is configured for the Call Center in place of the calling party’s number. This will display Call Center DNIS phone number instead of the caller’s ID number.
- Display DNIS name to agent instead of Calling Name – When this feature is enabled, the Call Center’s DNIS name that you have created for the call center will display instead of the calling party’s name.
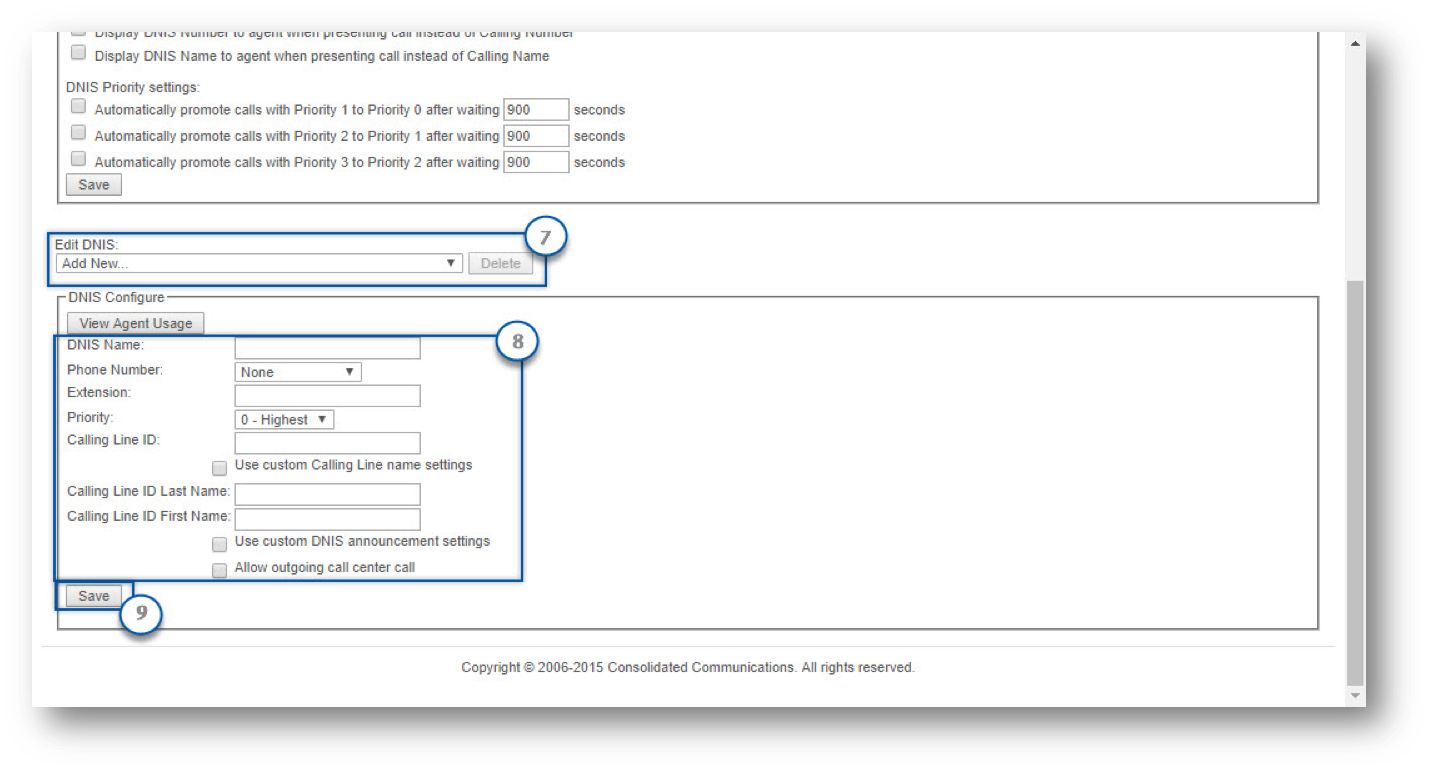
- Next, select your Priority Settings. This allows you to change the priority settings for calls in a Call Center that are normally sent to agents in the order that they enter the queue. They are based on the priority assigned to the calls based on the Call Center. Priority ranges from 0 (highest) to 3 (lowest). Calls can automatically be promoted to a higher priority if they are in a queue for a set amount of time. To automatically promote calls based on their time in the queue, check the appropriate box and enter a number of seconds.
- Select Save to save your settings.
-
- Finally, the Edit DNIS option allows you to configure alternate numbers and allows up to 64 different numbers to ring the same group of agents in a Call Center. To add a new alternate number, select Add New from the dropdown under Edit DNIS.
- Then, fill in the required fields.
- Select Save to save your settings.