Home |
MENU

Introduction
A Hunt Group is used to ring a specific group of users in a predetermined pattern within or across locations when a call is made to the Hunt Group telephone number. This guide covers the following topics for configuring your Hunt Group settings
1.
Renaming a Hunt Group
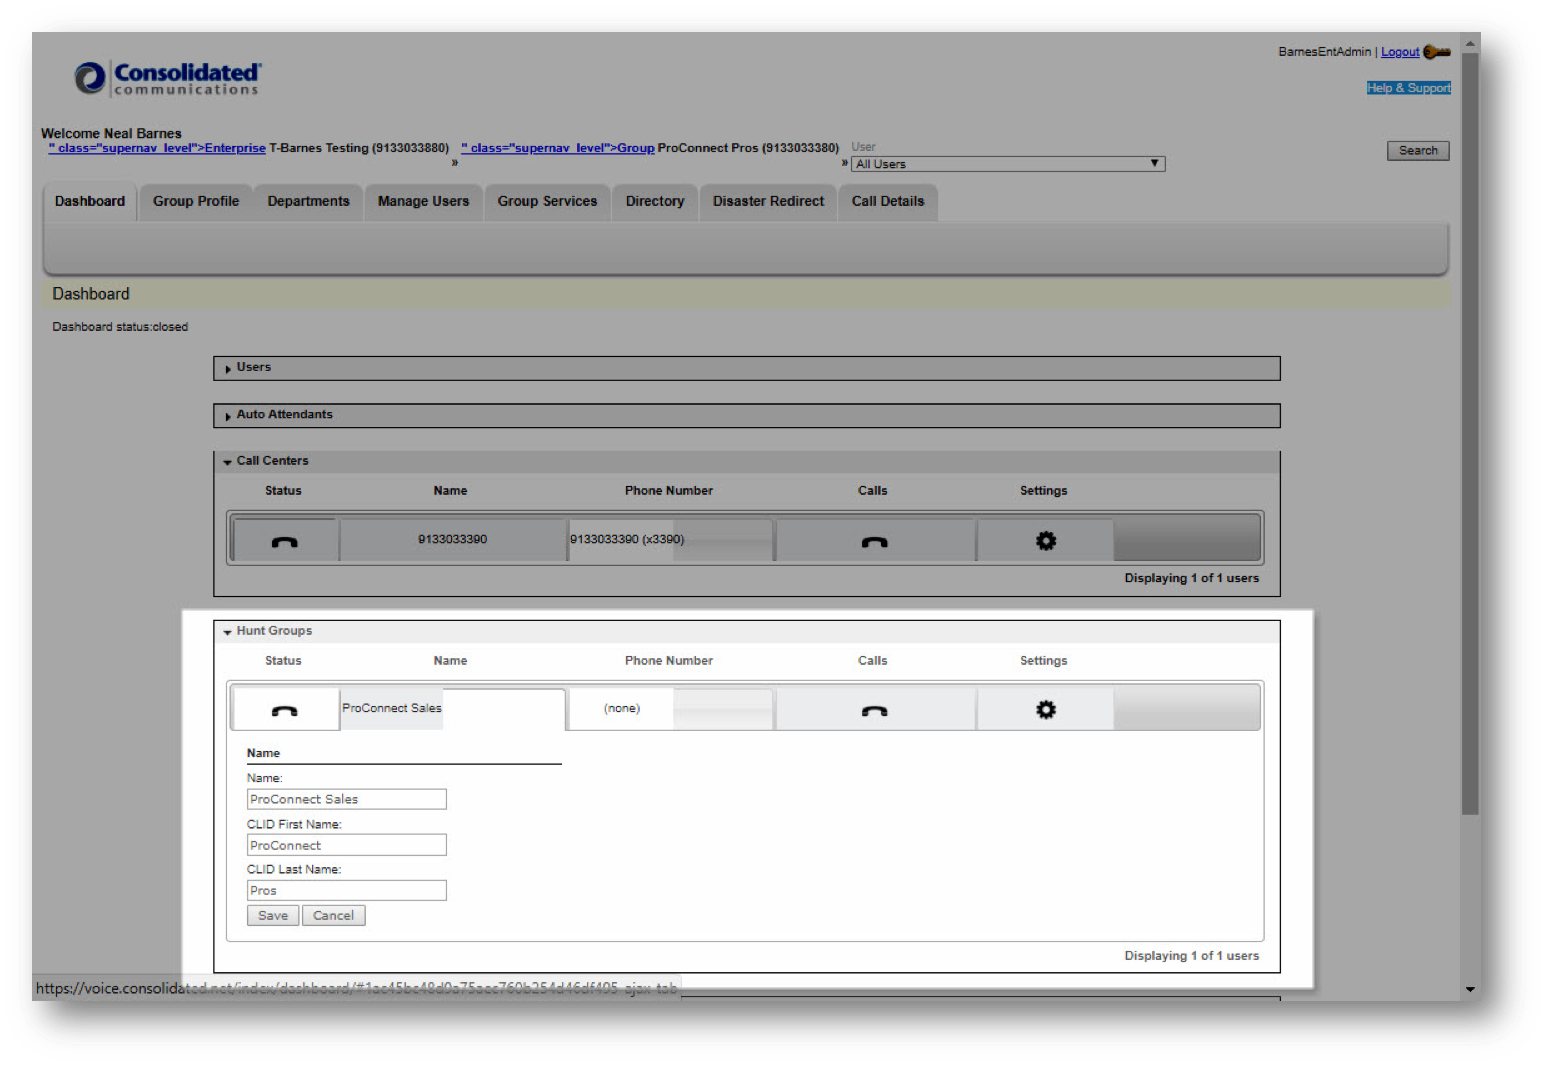
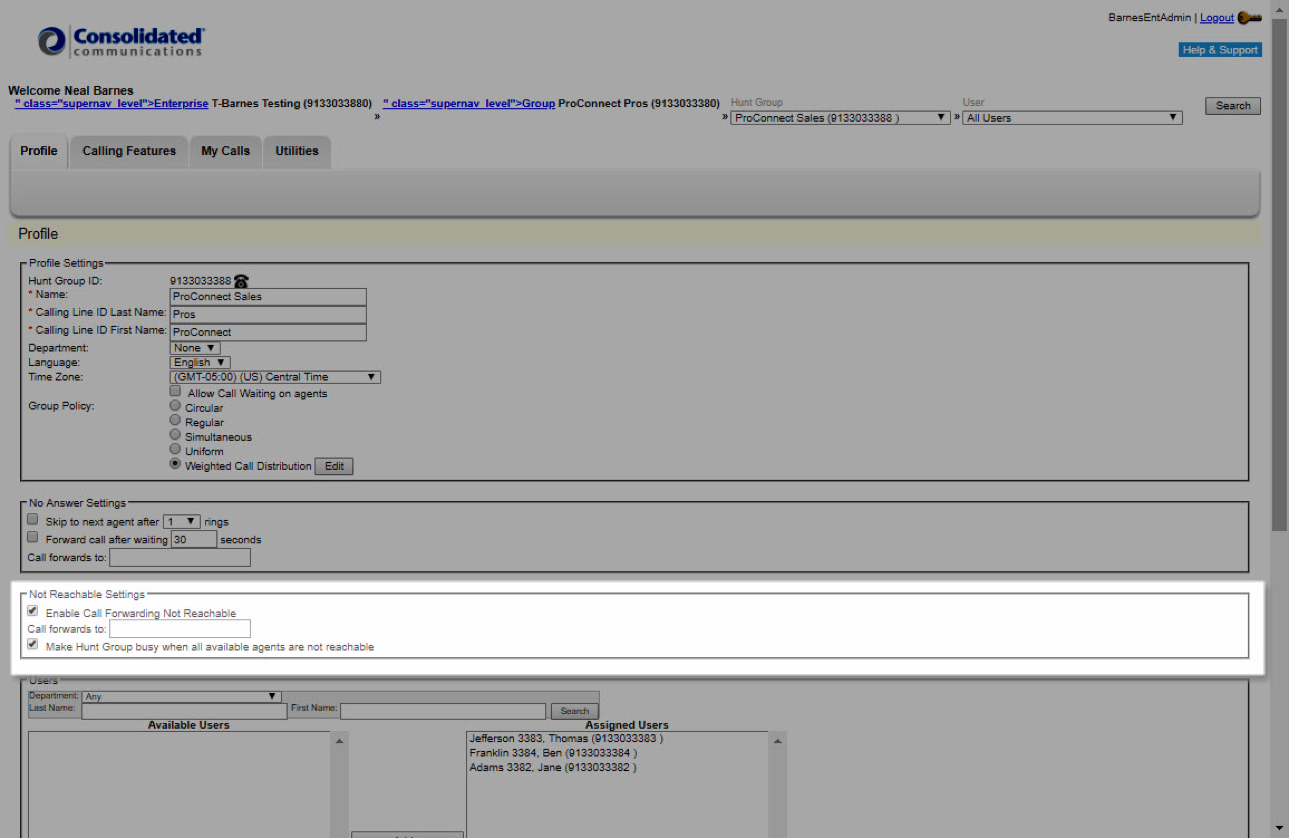
You can rename or edit the name of a Hunt Group or change the way that it appears on the phone display from the Consolidated Admin Portal.
To make changes to the name of a Hunt Group, follow these steps:
-
- From the Dashboard, go to Hunt Group.
- Select of the name of the Hunt Group.
- Next, edit the name field with the new name of the Hunt Group.
- In the CLID (Calling Line ID) First and Last Name fields, enter how you would like the Hunt group name to appear on the phone’s display of members of the hunt group when they are receiving a call.
Note: It is required to populate at least one character in both the First and Last name fields. Keep in mind that the longer the name of the Hunt Group, the more space it takes up on the phone’s display, possibly cutting off the caller’s caller ID.
-
- Once you have made your changes, select Save.
2.
Group Policy
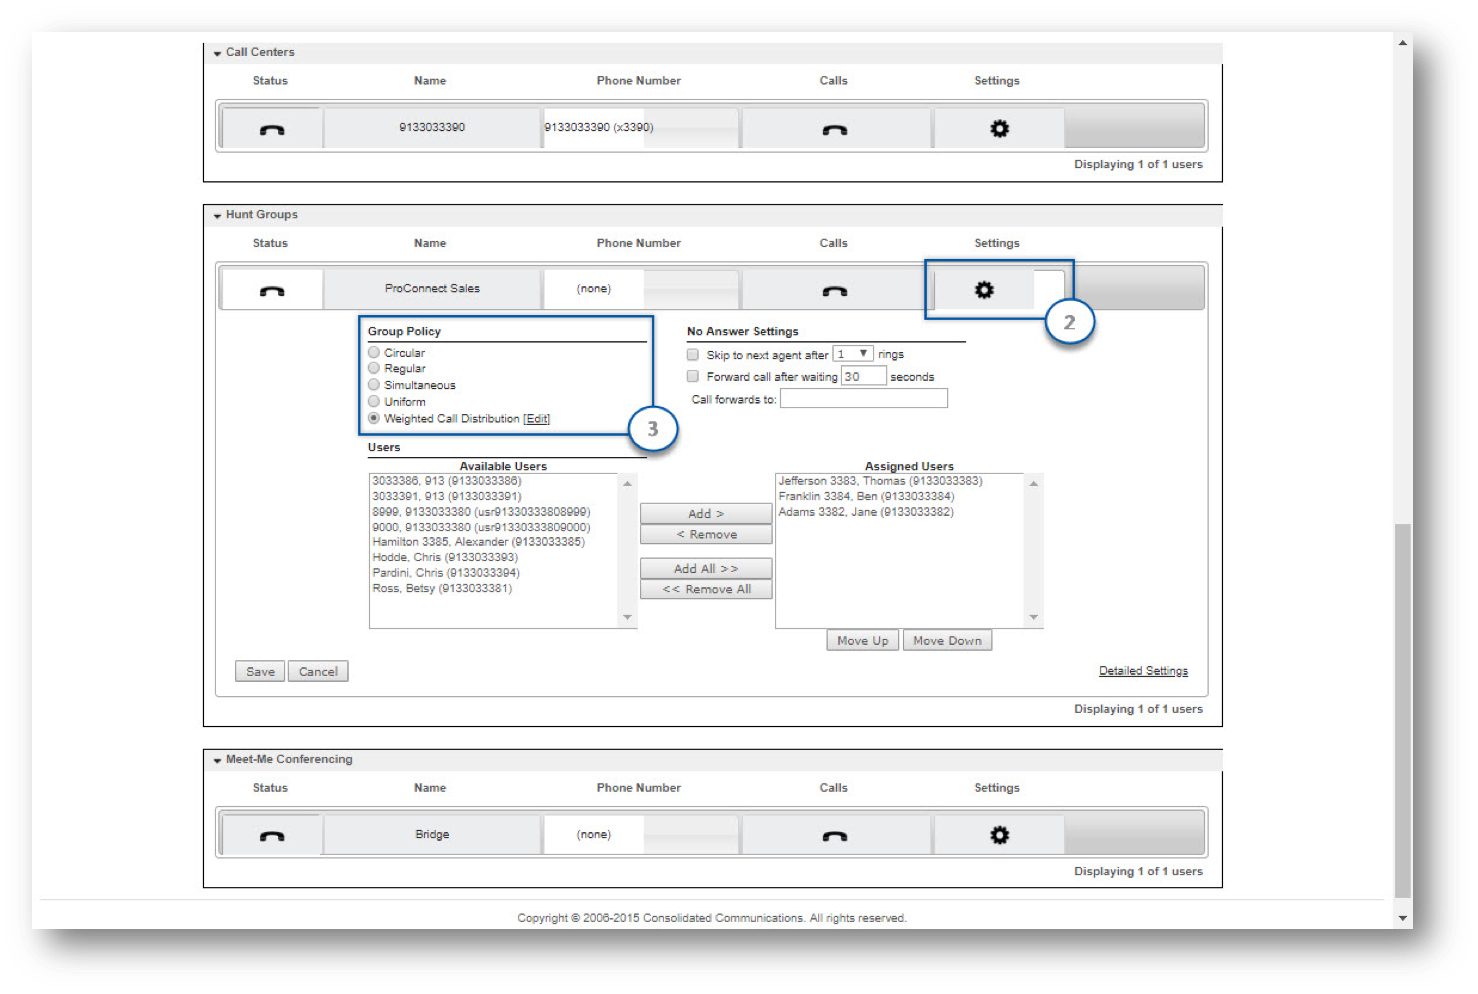
To make changes to the settings of a Hunt Group such as modifying the ring pattern and no answer settings, follow these steps:
-
- From the Dashboard tab, go to Hunt Groups.
- Select Settings.
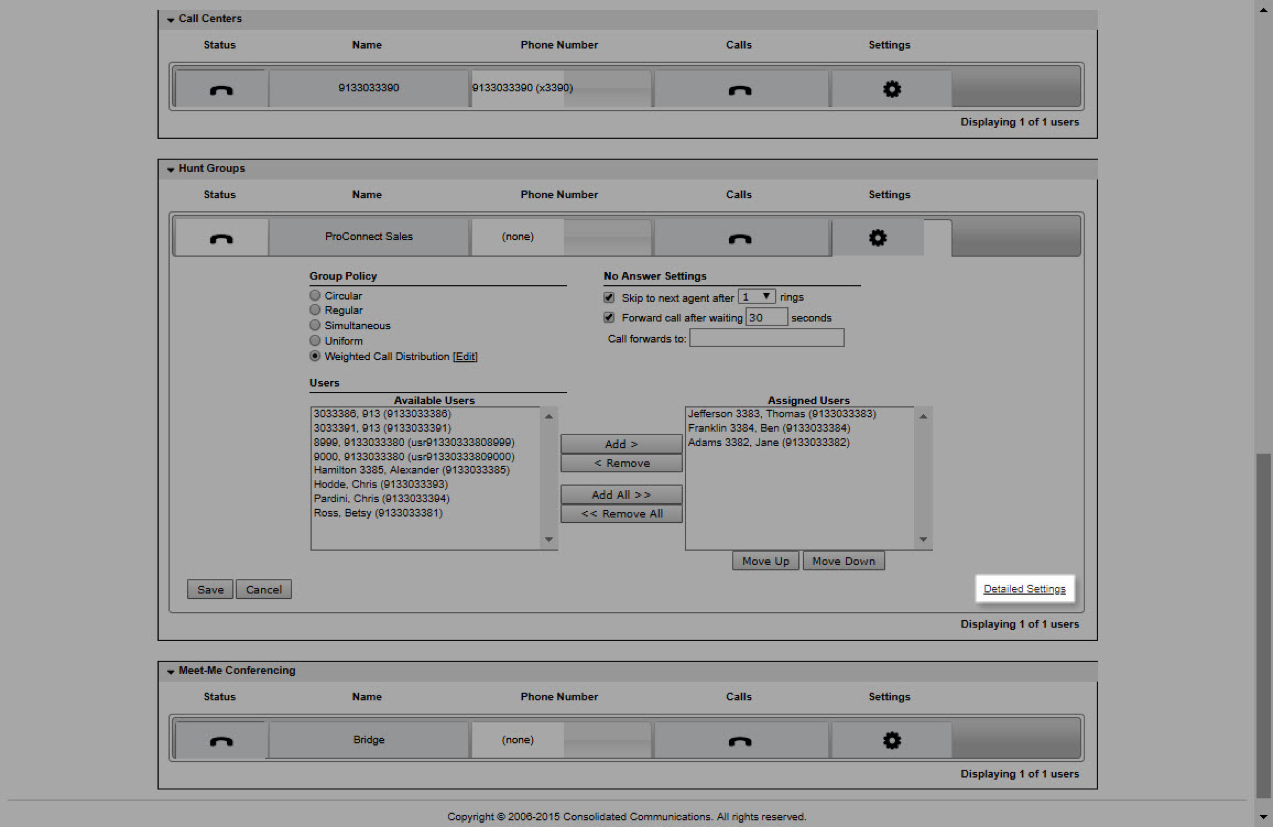
- To change the ring pattern, choose one of the options under Group Policy. These options include:
- Circular - Choose this option to ring the phones one-at-a-time, always ringing the Users in the same order. The system notes the last user to answer a call and then rings the next user on the “Assigned Users” list, in a circular pattern.
- Regular - Select this option to ring the phones one-at-a-time, always starting with the User configured at the top of the “Assigned Users” list first, followed by the users listed beneath, in sequential order.
- Simultaneous - Rings all assigned users at once.
- Uniform - Select this option to ring the User in the group who has been idle the longest.
- Weighted Call Distribution - Administrators may choose to direct a certain percentage of calls to individual Hunt Group Users. For example, Agent A is designated to receive 20 percent of calls, while Agent B receives 80 percent. To route calls to Users in this manner, select this option. If this option is selected, select Edit to assign weights (or percentages) to Users. These weight assignments must total 100 percent.
Note: Agents with a zero percent weight assignment will only receive calls when all other agents are on calls delivered to them from the Hunt Group.
3.
No Answer Settings
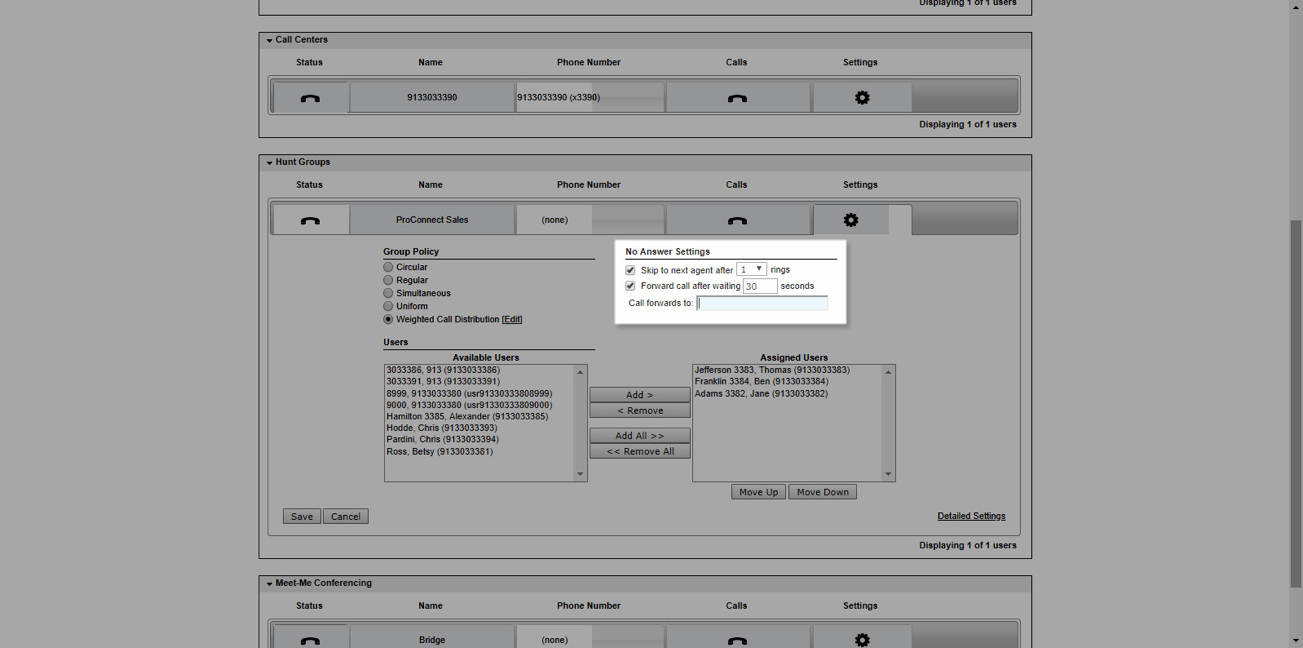
To change the No Answer Settings of the Hunt Group, edit the options under No Answer Settings.
- If your ring pattern is something other than Simultaneous, you can check Skip to next agent after (x) rings to skip to the next assigned user after a predetermined number of rings. Choose the number of rings before skipping to next user from the drop-down list.
- Hunt Group Forwarding settings are used to forward calls if none of the Hunt Group members are available to answer an incoming call. Check Forward call after waiting (x) seconds to enable forwarding and enter in the number of seconds before the call is forwarded. Note: Every 6 seconds equals to 1 ring. In the Call forwards to field, enter in the destination where the call will be forwarded to if unanswered.
Once you have made your changes, select Save.
4.
Assigning Users
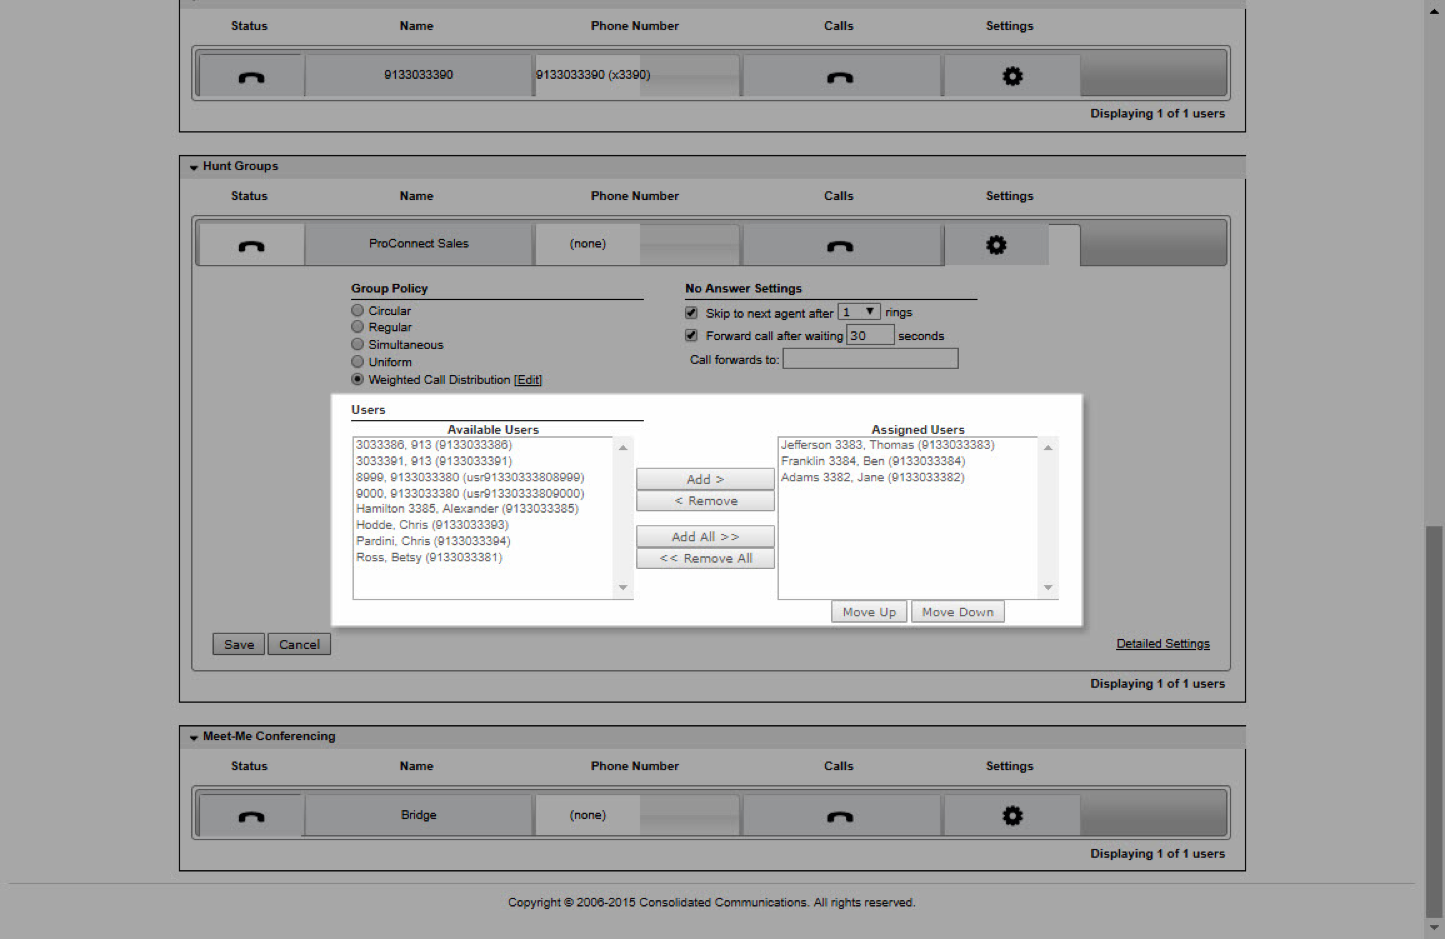
To reassign or modify assigned users of a Hunt Group:
-
- From the Dashboard tab, go to Hunt Groups.
- Select Settings.
- Under Users, you will see lists for Available Users and Assigned Users. The Available Users list contains people within your organization who are not currently members of the Hunt Group.
Note: If your organization has multiple locations you may see names listed in the Available Users list from those different locations, meaning that people working in different locations can be part of the same Hunt Group.
-
- To add users to the Hunt Group, select the user from the Available User list and select Add. This will place that user at the bottom of the Assigned User list.
- To change the order of the Assigned Users, select the user and select either Move Up or Move Down. The order of users is important especially when you have Regular or Circular ring pattern selected as the Group Policy. This order determines in which order calls will be received.
- To remove users from the Hunt Group, select the user from the Assigned User list and select Remove.
- Once you have made your changes, select Save.
5.
Additional Settings
-
- If you would like to edit features such as Call Waiting or Not Reachable settings, select on the Detailed Settings link.
-
- If you would like to turn on Call Waiting for the Hunt Group, check Make Hunt Group busy when all available agents are not reachable. This will allow the members of the Hunt Group to receive more than one Hunt Group call at a time. If Call Waiting is enabled and every User has four active calls, the next caller will hear a busy signal.
- Not Reachable settings are used to forward calls if users within the Hunt Group cannot be reached. For example, if your office loses network connectivity, Not Reachable settings will be activated. To enable, check Enable Call Forwarding Not Reachable and enter the destination. Alternately, check the box "Make Hunt Group busy when all Users in the Hunt Group are not reachable".
- Once you have made your changes, select Save.