Image
  • Administrators
    • Getting Started
    • Administrators Hub
    • Admin Portal Guide Library
  • End Users
    • Getting Started
    • End Users Hub
    • User Portal Video Library
    • User Portal Guide Library
  • Business Apps
    • Call Center
    • Broadsoft Thin Client
    • Webex App
    • SMS/MMS
    • Reception Client
    • Business Integrator
    • Advanced Call Reporting
    • Call Recording – Dubber
  • Phones & Voicemail
    • Cisco Phones
    • Poly Phones
    • Voicemail
  • Downloads & Links
  • Webinars
  • Contact Us

ProConnect User Portal – Push to Talk

Michael HarroldSeptember 20, 2021ProConnect User Portal

Home | End Users Hub | End Users | ProConnect User Portal – Guides | ProConnect User Portal – Push to Talk

MENU


  • Introduction

  • 1. Push to Talk

  • 2. To Configure Push to Talk

  • 3. To Add Users to Your Access List

Print Friendly, PDF & Email

Introduction

The push-to-talk feature allows users to treat their desktop phones as either a one-way or two-way intercom.


1.

Push to Talk

  1. From the user dashboard, locate and click on User Service Settings.
  1. The Services page will appear.
  2. Proceed to locate and click on Push to Talk. This will give you access to the Push to Talk configuration page.

2.

To Configure Push to Talk:

  1. Click on the Settings icon within the Push to Talk table.
  1. To enable auto-answer, check the checkbox next to Auto Answer.
  2. Next, choose a Connection Type:
    One-way - The users you add to the allowed users' list can chat with this person but only in one direction. With this option, the person you enable push-to-talk for cannot respond to the people in the allowed users' list.

    Two-way - The users you add to the allowed user’s list can have a two-way conversation. With this option, the person you enable push-to-talk can respond to the people in the allowed user’s list.

  1. Proceed to choose your access list from the drop-down menu.
  2. When finished, click on the Save button.

3.

To Add Users to Your Access List:

  1. Click on the Settings icon within the Users table.
  1. The Edit User List will appear. To add selected users, go down the list and click on the corresponding numbers. These users will now move from the Available list to the Selected List.
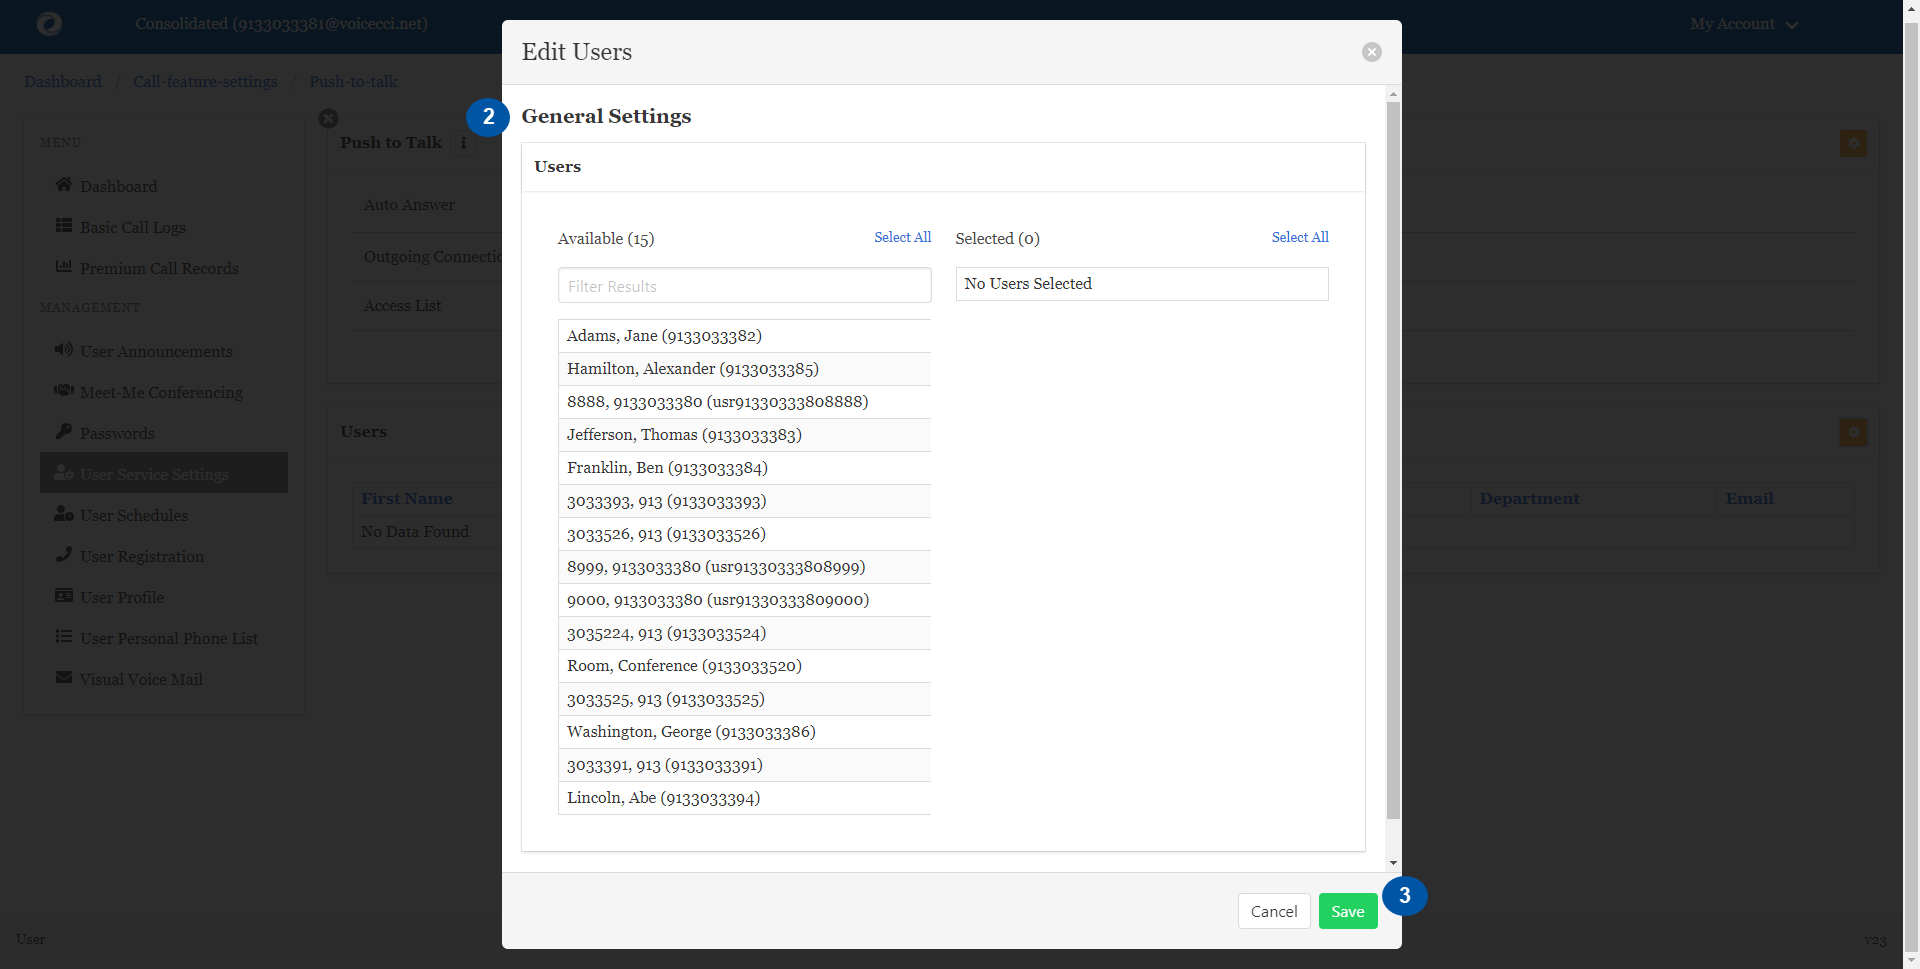
  1. When complete, click the Save button.

Tags:Admin, Admin Portal, Attendants, Auto, Auto Attendants, Call Center, change, conference, conferencing, holiday, Holiday Schedules, Hunt Group, login, meet, meet me, Overview, password, reset, resetting, users

Upcoming Events

To learn about all available training options, please click here.

ProConnect's Webex

Thursday, May 8th
at 2:00pm ET (60 min)


Register Now

Advanced Call Reporting(Akixi)

Thursday, May 15th
at 2:00pm ET (60 min)


Register Now

Admin Portal

Thursday, May 22nd
at 2:00pm ET (60 min)


Register Now

Poly Edge E400 Series Phone

Thursday, June 5th
at 2:00pm ET (60 min)


Register Now

© 2024 Consolidated Communications. Powered by B-LYNK
  • Home
  • Getting Started
    • Administrator
    • End User
  • Help Topics
    • Administrators
    • Business Apps
    • Phones and Voicemail
  • Downloads & Links
  • Webinars
  • Contact Us